TESTNET — Instructions for claiming Graphene on Binance Smart Chain

The instructions below are for users who wish to assist with testing the claiming process of Graphene on Binance Smart Chain.
WARNING — Instructions are for testing purposes ONLY. Please do not follow these instructions when trying to redeem Graphene on the Binance Smart Chain mainnet.
Step 1:
Install MetaMask and add the Binance Smart Chain testnet to it.
CLICK HERE FOR INSTRUCTIONS OR FOLLOW LINK BELOWConnecting MetaMask to Binance Smart Chain | Binance AcademyMetaMask can be downloaded on Chrome and Firefox, or on iOS and Android if you’re a mobile user. For the purposes of…academy.binance.com
Please note that you should follow the instructions for the BSC Testnet. Do NOT follow the instructions for the BSC mainnet.
Step 2:
Go to the Testnet ‘faucet’ and get some Testnet BNB.
The instructions provided in Step 1 will explain how to do this.
Step 3:
Download the latest TEST release of v1.7.1 of the Phore Core wallet
CLICK HERE TO DOWNLOAD OR FOLLOW LINK BELOWRelease v1.7.1-rc4 · phoreproject/PhoreYou can’t perform that action at this time. You signed in with another tab or window. You signed out in another tab or…github.com
Please note this is the same as the current v1.7.0 with the addition of the makeairdropfileRPC command.
There is no risk to your funds due to this change, the only thing that command does is sign some messages for each of your addresses and stores the signed messages (but no private keys) in the file it creates. As usual, you can type the RPC command in with the debug console, or using phore-cli if you are using the phore daemon instead of the Phore-Qt GUI. The test is using the BSC testnet, and is testing the Phore mainnet snapshot for the first airdrop.
Step 4:
Here is the help text for makeairdropfile:
makeairdropfile "bsc_address" airdrop_number "filename"Sign all Phore addresses in JSON format and output to file to be used for airdrop.Arguments:
1. "bsc_address"    (string, required) The BSC address to receive tokens
2. airdrop_number    (integer, required) The airdrop number
3. "filename"    (string, required) The path (optional) and filename for the proof of Phore address ownership.
                                      If path is not specified, file is created in Phore data directory.Examples:
> phore-cli makeairdropfile "0x6ac7ea33f8831ea9dcc53393aaa88b25a785dbf0" 1 "airdrop.txt"
> curl --user myusername --data-binary '{"jsonrpc": "1.0", "id":"curltest", "method": "makeairdropfile", "params": ["0x6ac7ea33f8831ea9dcc53393aaa88b25a785dbf0" 1 "airdrop.txt"] }' -H 'content-type: text/plain;' http://127.0.0.1:11772/
The BSC address would be the main account address from Metamask for the BSC testnet account. For the airdrop number in this case you should choose 1. The filename can be a full path and filename or just a filename, if you don’t include the path then it would make the file in your Phore data directory.
Run that command to create your airdrop proof of ownership file.
You should now be set up to go to the testnet airdrop website.
Step 5:
Using the same browser that you added Metamask to, visit the testnet airdrop website.
CLICK HERE TO GO TO THE TESTNET AIRDROP WEBSITE OR FOLLOW THE LINK BELOW
http://phore-airdrop-website.s3-website-us-east-1.amazonaws.com/home
If your Metamask is set up properly it should look like the image below:
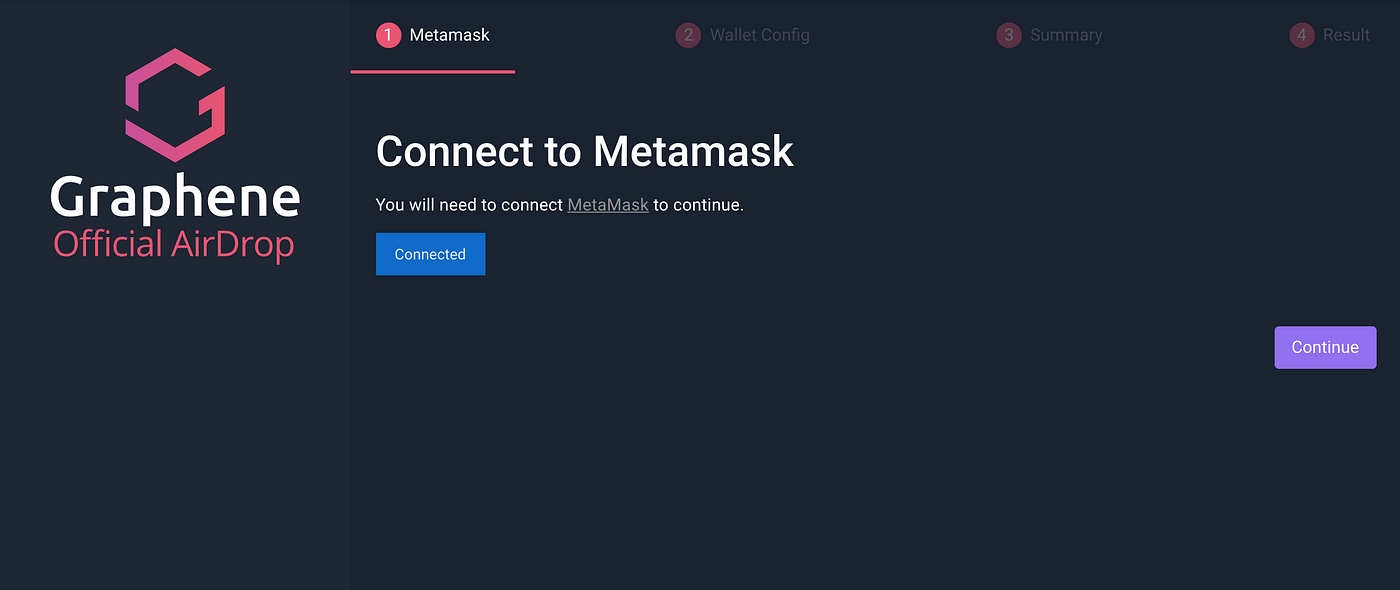
Step 6:
If you are connected, you will be able to click the purple ‘Continue’ button. This will take you to the next screen shown below:
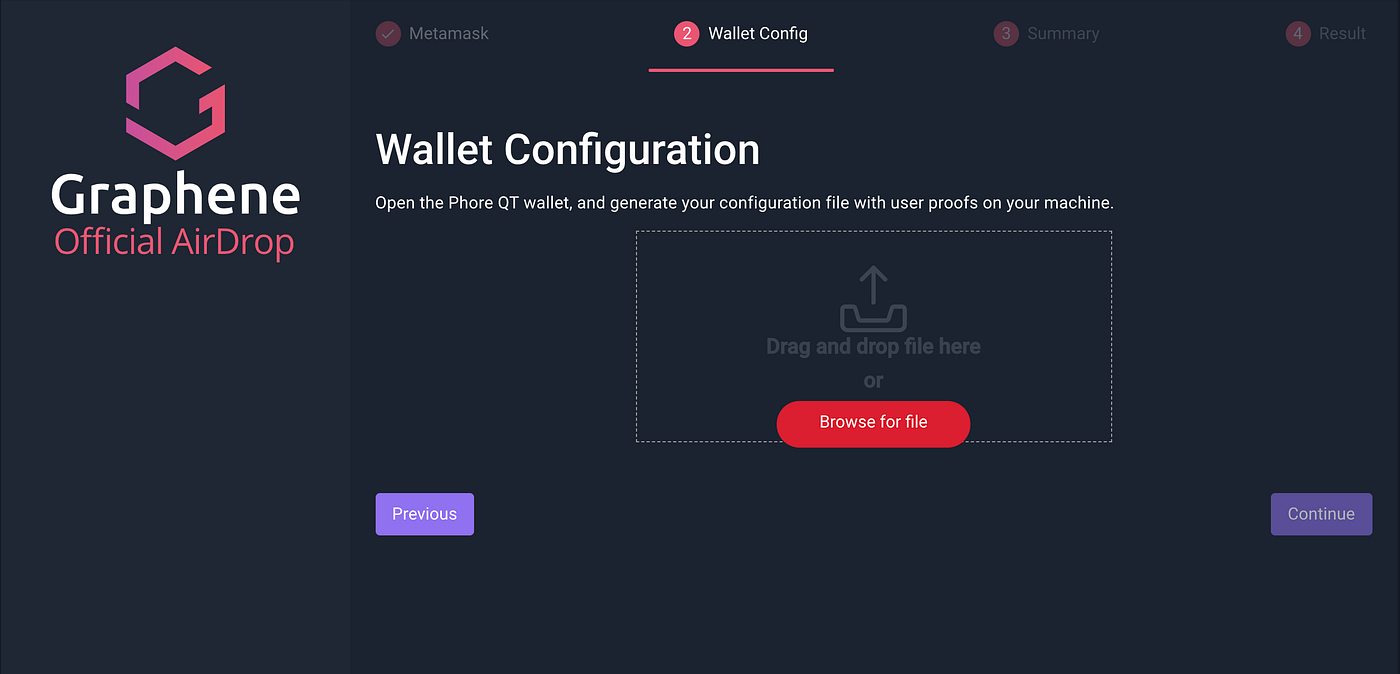
This is where you upload the airdrop proof of ownership file. You should be able to either drag & drop it, or click the Browse file button and navigate to where you had the wallet create the file.
Once it is uploaded, it should look something like this:
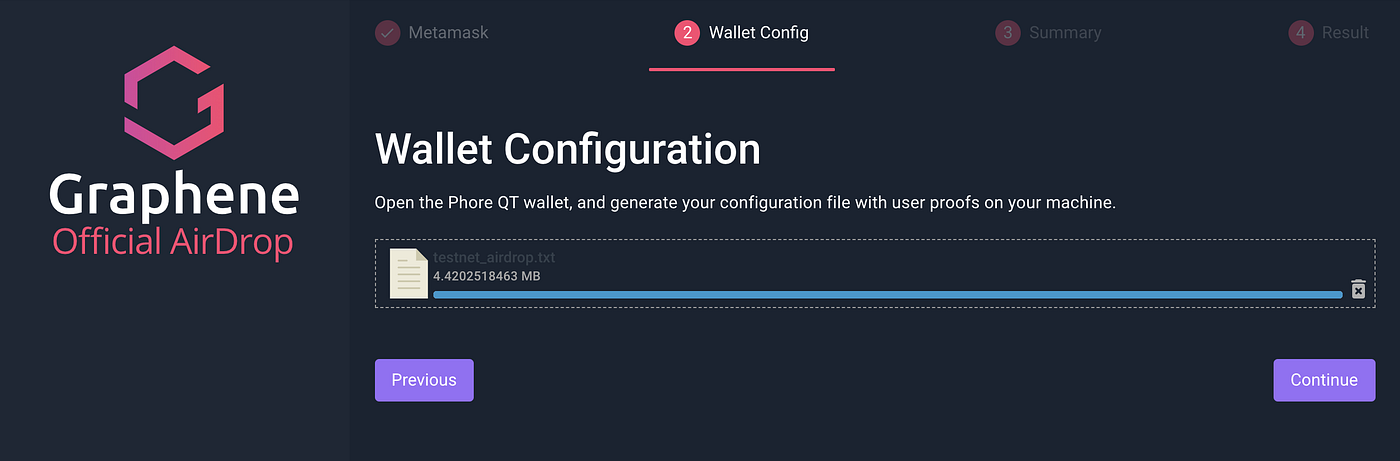
You should then click ‘Continue’.
Step 7:
You should see a spinner circling around as the system analyzes your file and determines which addresses had balances in the snapshot block that should get GFN token redemptions. Once it finishes it will display a list of the addresses, the balances it found, and whether or not it is considered valid for token redemption (true or false). At the bottom it should show the total amount of GFN tokens to be redeemed. This should be the balances, multiplied by 10 for the 10:1 token redemption, and divided by 6 since this is just for the 1st of the six airdrops.
Review this, and if you are ready to do the redemption, click ‘Continue’.
Please note that if you have a lot of addresses you may need to scroll down to see the Continue button, or you can just click on the Result step on the top right corner which would do the same thing.
Step 8:
Completing Step 7 should result in your MetaMask wallet popping up and asking you to confirm the transaction. Click ‘Confirm’.
You will then be notified once the transaction is confirmed on the Binance Smart Chain testnet.
If you click on the confirmation you can review the token redemption on the testnet bscscan to see your successful claim of Testnet BSC Graphene!
Feedback and Comments
If you see any issues anywhere along the way, or if anything is confusing and you think needs to be clarified, please let us know by logging any issues in the Phore GitHub Issues: https://github.com/phoreproject/Phore/issues
You might need to create a GitHub account to log an issue if you don’t already have one.
There are already some issues logged there that we have found in our own testing, you can review those to see if the issue you found has already been reported.
We really appreciate your help in testing this system and helping to ensure we have a successful Graphene airdrop launch on the BSC mainnet! If anyone has any questions by all means let me know.